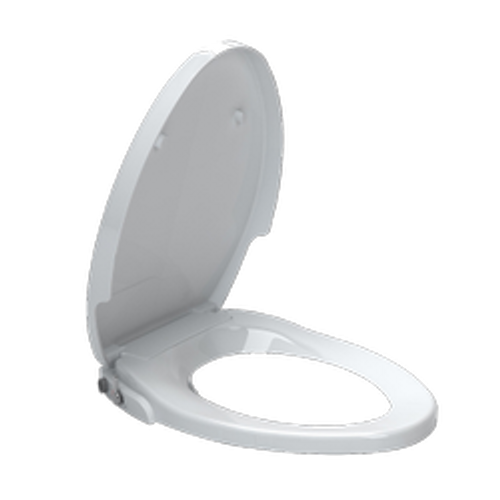
American Standard toilet seats may need to be replaced from time to time, due to cracks, discoloration, old designs, noises and more. Here is a guide on how to remove, replace and repair an American Standard toilet seat.
How to remove an American Standard Toilet Seat
1. Open the bolt caps
This will give you access to the seat fasteners. The bolts are usually at the back of the hinged seat and are made of plastic material. Open the bolt caps by prying them upwards. You can use your finger or a screwdriver. Do not use too much pressure since you may damage the caps.
2. Grip the American standard seat fasteners.
You can use a pair of pliers or a vice-like grip to hold the nuts firmly. These nuts are usually screwed onto the threaded end of each bolt on the seat. The wing-shaped nut can be gripped using your hands or a pair of pliers. Apply a little bit of pressure on the fasteners to your toilet seat.
3. Unfasten the bolts and remove the seat off the toilet.
Unscrew the bolt counterclockwise using a screwdriver. We recommend a large screwdriver, which can best fit the bolt head. Next, simply remove the toilet seat. Now you can install a new one! Put the small toilet seat pieces, i.e. the nuts, bolts any other loose parts inside a sealable plastic bag. This is to make sure you do not misplace/lose any parts of the toilet seat.
How to detach a stuck American Standard toilet seat
1. Lubricate.
Revitalize the rusted metallic parts of your toilet seat. Spray penetrating oil onto the hardware such as the bolts and nuts, so that they can come off more easily when you remove them. Give about 5-15 minutes for the penetrating oil to seep into the hardware and break up any corrosion that may be there.
2. Secure the seat.
Using tape, secure the toilet seat. Securing the seat ensures that there are no damages while applying the stubborn/stuck seat removal techniques since there is a chance that you may push too hard against the seat while trying to remove it.
3. Remove the bolts.
Using a socket wrench or a socket extension (depending on how far deep the nuts are), fit it directly onto the nuts that are holding the bolts in place. Then turn the socket extension counterclockwise to break the nuts loose.
4. Cut through unmoving hardware.
To prevent scratching the surface when you use a hacksaw, position a putty knife so that it covers the toilet around the head of the bolt. Cut bit by bit of the hardware fastening the seat to your toilet.
5. Drill through resistant bolts.
You may need to drill through resistant bolts.
At the point where the nut and bolt meet is where you should drill firmly using very steady pressure. Remove the bolt when it comes completely loose. Be careful when drilling!
5. Loosen the nuts with a propane torch.
If the above techniques don’t work, you can loosen the bolts using a propane torch. Put a piece of metal between the torch and the porcelain, and use a low flame setting to not damage the porcelain. Heat the stuck bolts for a while and then try to loosen the stubborn bolts with a vice-like grip. Be careful to not burn yourself! We recommend keeping a fire extinguisher nearby.
How to replace an American Standard Toilet Seat
Before you begin installing the American Standard toilet seat, make sure you:
- Measure the current toilet bowl using a tape measure and write down the measurements.
- Pick the style of the American standard toilet seat that you prefer. You can choose a rounded toilet seat or an elongated toilet seat. We recommend a soft closed toilet seat.
- Choose a toilet seat that matches the color of the current toilet bowl.
Tools:
An adjustable wrench
Hacksaw
Spray oil
Screwdriver
Meter
1. Set the new toilet seat.
You will notice that the new toilet seat hinges are already pre-attached. Align the hinges to the same position as the old ones.
2. Drop the bolts through the holes.
The hinges have the holes in which you are required to drop the bolts.
3. Thread the nuts.
Using your hand, turn the nut clockwise into the bolt until it is tight. To tighten the nuts, you can use an adjustable wrench. Do the same with the other nut on the other side of the toilet seat.
4. Snap the seat instead.
For the toilet seats that do not require you to drive the bolts through the hinges, you can drop the bolts directly to the holes and fix them in place using nuts. The toilet seat’s hinges will snap onto the bolt heads.
How to Maintain Your American Standard Toilet Seat After Installation
- Clean the hardware regularly - Use a general-purpose bathroom cleaner. Avoid using abrasive cleaners as this can damage the porcelain.
- Tighten the nuts - Use rubber bushings, and slide the circular ones up the threaded side of the bolt, with the tapered side facing upwards. Using the tightening tool that came with the bushings, tighten the nuts to secure them.
- Add seat stabilizers to lose seats - Fasten the seat stabilizers to those seats that wiggle back and forth. These stabilizers should be able to touch the inner rim of the toilet bowl. After you have put the stabilizers in position, fasten those using screws.
- Replace worn-out parts - Some parts of the toilet seat may become thin and brittle, and others may discolor - it may be time for a replacement!
You can always contact professional services to help with repairing and replacing your toilet seat!

