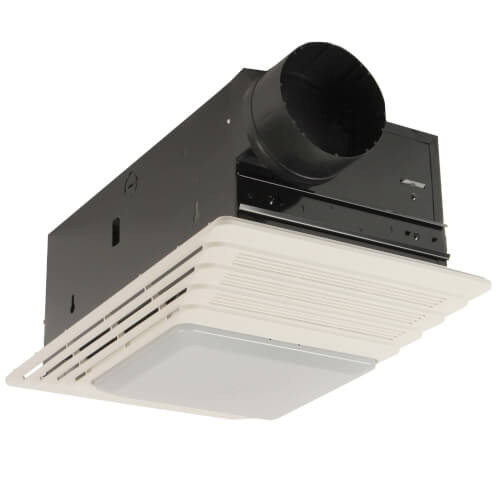
How to Install Replacement for Models 655, 659 & 659F
- Ensure the heater assembly is unplugged from the red receptacle.
- Unfasten the two retaining screws that are on the inside of the heater discharge opening. In the area between the outer wall of the discharge opening and the fan housing, place the tip of the screwdriver. Pry with the screwdriver in an outward manner until the exhaust discharge slips off the support lip that is located on the outer housing.
- Lift heater assembly out of housing after unhooking the hinge pins. CAUTION: Before operating the heater, remove the shipping ring from the heater blower inlet.
- Then unplug the Broan fan assembly from the black receptacle and remove the plastic bag that is there and set it aside.
- Loosen and remove the mounting screw. Lift the Broan fan assembly out of the housing and be careful not to damage it.
- Reference the wiring diagram of your unit to smoothen the process. Get rid of any appropriate knockout(s) by inserting a screwdriver blade inside the slots. Bend the screwdriver back and forth to break tabs.
- Insert the mounting brackets (adjustable) into the bracket channels on the housing.
- Decide on a location that allows the Broan fan to be vented outside with the shortest duct run and the fewest number of elbows to enable faster and more efficient results.
- Position the unit between joists and then extend mounting brackets. Position the brackets in such a way that the bottom edge of the housing will be near the finished ceiling. Mark the top of the keyhole slot on all four mounting brackets.
- Temporarily remove the unit, and pound nails partially into the joists at all four marked locations.
- Hang the unit from nails and use embossed measuring guides to check if the unit sits well with the finished ceiling. Pound the nails as tight as possible. For wide joist centers: An 8 by 3/8 self-tapping screw can be used to join extended brackets together and create a rigid mount that is firm. Crimp the bracket channels tightly around mounting brackets to ensure the mount is noise-free.
- Install the damper/duct connector onto the housing. Ensure that the tabs on the connector can lock in housing slots. Note: The top of the damper or duct connector will be flush with the top of the fan housing. The damper flap should always be in place inside the duct connector. If it is not, you can fix it by squeezing the top and bottom of the connector to be able to snap the flap back into place. The installation work and electrical wiring should only be done by a qualified person(s) by all applicable codes and standards, inclusive of the fire-rated construction codes and standards.
- Wire the unit accordingly.
- Replace the heater assembly that you removed in STEP 3 above and then plug it into the red receptacle. Direct all the wires away from the blower inlet.
- Replace fan assembly as removed in STEP 5 above and then plug it into the black receptacle.
CAUTION: Install the grille only as shown in the owner’s guide to avoid the possibility of overheating and/or fire. The Acorn nut and tooth washer must always be attached to the threaded rod through the proper hole in the light reflector. - Slide the light reflector into the opening in the Broan fan grille and plug it into the white receptacle. Attach grille reflector assembly to the threaded rod on housing using an acorn nut and tooth washer that is in the plastic bag. Tighten using a pair of pliers or nut drivers. Install a light bulb that is about 100 Watt maximum.
- Install the light lens by hooking one of its tabs into a notch in the grille/reflector assembly or apply light pressure to another tab with fingertips and snap it into place.
Installation Warning:
To reduce the risk of disasters such as fire, do not store in areas where there is gasoline or any other flammable vapours and liquids. None of these flammable entities should be in close vicinity to the heater.
CAUTION: To prevent high temperatures and the risk of fire, always keep electrical cords, drapery, furnishings, and other combustible material at least 3 feet away from the front of the heater and away from the side and rear.

