

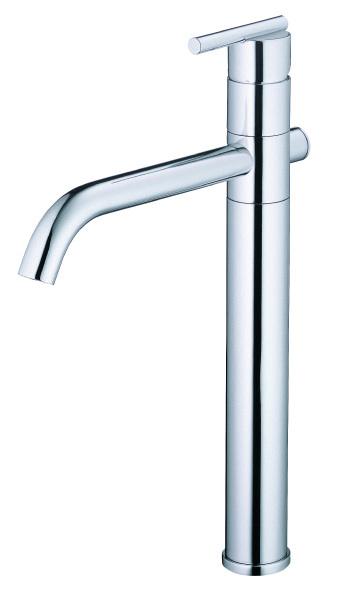
This guide will walk you through how to install a Danze kitchen faucet, particularly one with a top mount bracket, how to pass the hoses to the mounting base, for types 1 and 2, as well as how to install and adjust the weight that is on the spray hose.
How to Install a Faucet with Top Mount Bracket
1. In the case that the top mounting bracket is not in the right position, lower the lock nut. Turn the mounting brackets in a counterclockwise manner using a hex wrench until the lock nuts reach the bottom edge of the mounting base.
2. Move the lock nuts with your hand to ensure that they are tucked in as they should be. Insert the mounting base to its proper position on the sink. Position the word front (or in some cases the arrow) that is at the front of the sink in a way that it faces you.
3. Turn the mounting base to the sink or counter in a clockwise manner using a hex wrench. This should prevent the lock nut from moving up from under the sink, and it also fastens the mount onto the counter securely.
How to Pass Hoses to the Mounting Base
If the hose adapter is connected to the long spray hose, detach the two. If the two are not connected, you can go ahead and skip to the next step.

There are two types of plastic hose adapters currently available:
Type A
One side is a slide-in, and the other side is threaded into the hose. To remove it, unscrew the connection from the hose.
Type B
Both sides slide in a plastic hose adapter.
To detach it from the hose:
- Compress the adapter by pushing the quick-connect down. Your finger should be on the end of the black plastic side of the white adapter while you compress it at the same time.
- Pull the plastic hose adapter away from the long sprayer hose. Different types of top mounting brackets are dependent on the faucet model that you have. To verify the version of bracket that your kitchen faucet has, check above the top mounting bracket.
For Type 1 top mounting bracket:
Through the round opening that is at the top of the sink/counter, pass the long spray hose through it.
Proceed to pass through the larger opening from the top of the sink, the hot and cold lines. This should be done one at a time.
Through the larger opening that is at the top of the sink/counter, pass the spray hose supply through it.
For Type 2 top mounting bracket:
Slide the two hoses that you previously inserted over to the smaller opening and pass the hot and cold water supply lines from the top part of the sink/counter.
Pass the spray hose supply line and the 3 hoses of your faucet back to the large opening.
Pass the spray hose through the smaller opening.
Faucet Line up and Lock-in
Check the top of the mounting bracket from the side to know the type of bracket that you have. There usually are different types of locking mechanisms that are at the top of the mounting bracket, which is why it is important to check which one you have.
For Type 1:
Lower the faucet into the mounting bracket and rotate it counterclockwise to lock the faucet properly into place.
Lower the faucet to the countertop.
Rotate the faucet so that it stops turning in a counterclockwise manner. It should be about a quarter of a turn.
The set screw should be aligned with the opening of the unit if the faucet is the pull-out kind.
Tighten the set screw that is on the faucet’s body by turning clockwise.
For Type 2:
Align the grooves of the mounting bracket with the arrow that is on the faucet body.
To secure the faucet to the mounting bracket, you should tighten the set screw on it.
Connect the hoses and place the weight onto the spray hose.
How to Install and Adjust the Weight on Your Spray Hose

The following are instructions on how to install and adjust the spray hose weight.
To install the weight, you will need to:
- Install the weight on the hose.
- Adjust the weight to its correct position.
- Test the spray hose for proper retraction.
There are currently two different types of weight:
Old version weight: the one that has screws
New version weight: does not have screws
For the Old Version:
Step 1 – Install the weight on the hose
For the egg-shaped weight, separate the two pieces. And then loosely tighten the pieces together after you have placed them on the spray hose.
Step 2 - Adjust the weight to the correct position
Install the weight in the location which you have found fit for it. The location may vary from faucet to faucet. The point between the spray head and the lowest point on the spray hose is usually the best location for the weight. Ideally, the best location should be above the lowest point of the spray hose.
put the weight on the spray hose in its correct position. Tighten the two pieces together using a screwdriver.
Step 3 - Test for proper spray hose retraction
Test if the spray head retracts properly by pulling it out. Install the weight of the weight a few inches higher up on the spray head, if the spray head fails to retract properly. Check again to ensure that the spray head retracts properly.
Before checking the operation of the spray head, make sure that there is no form of obstruction.
For a New Version:
Step 1 – Install the weight on the hose
At the exact place where the spray hose starts to loop, push the weight on there.
Turn the upper part of the weight in a counterclockwise manner so that it completely closes.
Step 2 - Adjust the weight to the correct position if the weight is not installed at the optimum location.
The weight has to be placed at the top of the spray hose’s loop.
If the weight is not at the location that is supposed to be in, remove it from the spray hose.
Set the weight in its proper location to reattach it as explained in step 1.
Step 3 - Test for proper spray hose retraction
Test if the spray hose is properly retracted by pulling it out. Again, if the hose fails to retract, change the weight’s location to be a few inches higher up on the spray hose.
Ensure that there is no obstruction under the counter before you test the spray hose’s retraction.
Conclusion
This guide has given detailed information on how to install your Danze faucet. If you need further help, you can always contact a professional.