

Photo from Home Repair Parts
Shower faucets come in different styles. Depending on the shower faucet type, there are several ways to correct the leak. Products like the Delta Monitor 1500 series shower faucet are built to last. However, that does not imply they are not prone to problems. A leaking shower faucet is common.
Delta Monitor 1500 Series Shower Faucet Repair
It is necessary to understand the causes of shower faucet leaks. This helps you to assess whether the problem can be resolved by you, or requires the assistance of a professional.
Problems with Delta Monitor 1500 Series Shower Faucet:
Anything used regularly, no matter how well it was made, is likely to develop problems. After all, fittings must be replaced over time. How effectively you maintain and care for them determines how long they will last.
Here are some of the common causes of a leaky Delta Monitor 1500 series shower faucet:
- The nuts may be loose if the leak occurs near the packing nut area, or at the base of the handle.
- The washers are worn out, of poor quality, have been fitted incorrectly or are the wrong size.
- O-rings wear out in the disc, ball faucets, and cartridges, which causes leaks.
- If your faucet has two handles, the washers on the ends of the valve stems are likely the source of the leak. The cartridge or ball valve on your single-handle faucet may be broken in some cases, resulting in a leak.
How to fix a Delta Monitor 1500 Series Shower Faucet
Tools:
- Rags
- Pliers
- Allen Wrench
- Channel Lock Pliers
- Delta Monitor Faucet Repair Kit
1. Turn off the water supply before opening up the shower valve. In some homes, a shut-off valve can be found in the bathroom, near the shower or in the basement.
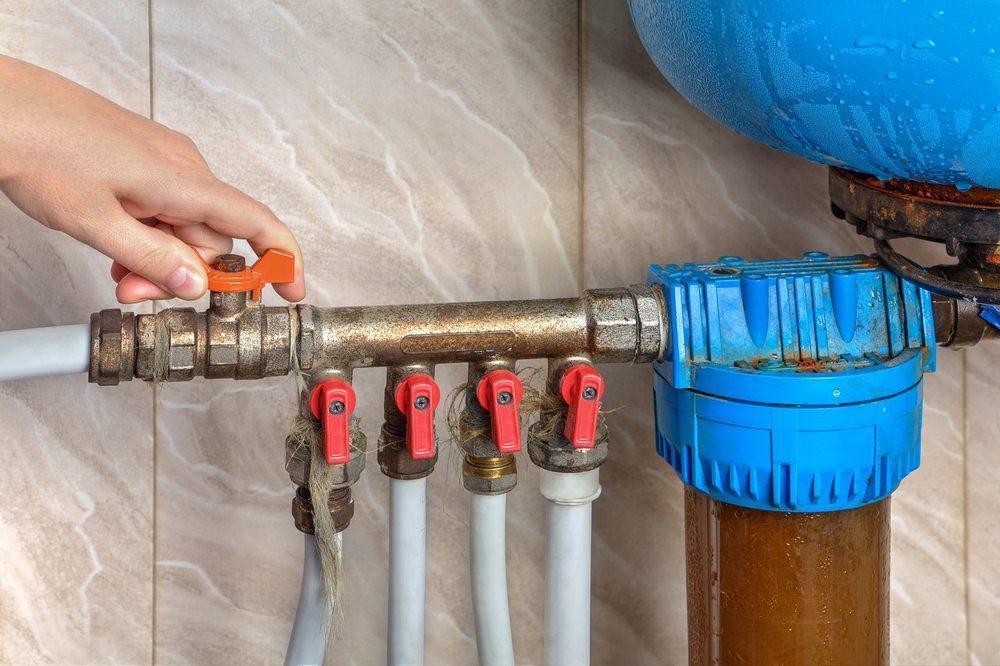
Photo from BWHCO
If you cannot find it in these spots, turn off the main water supply instead. After you have turned it off, turn your shower on to make sure there is no water flowing out.
2. To avoid losing small parts of the shower faucet, place a rag or a drain stopper on top of the drain. Place some rags on the shower floor or in the tub beneath the faucet when working on it. This prevents small parts from falling down the drain, and it also protects the surfaces.
Place another rag on the floor or a flat surface. As you disassemble the faucet, place the parts in the correct order on top of the rag. This will make the reassembly easier.
3. Using an Allen wrench, remove the set screw at the base of the shower faucet handle. Place the set screw on the rag and gently pull the handle off. If the handle won't come off by hand, wrap a rag around it and gently twist it off using the pliers.
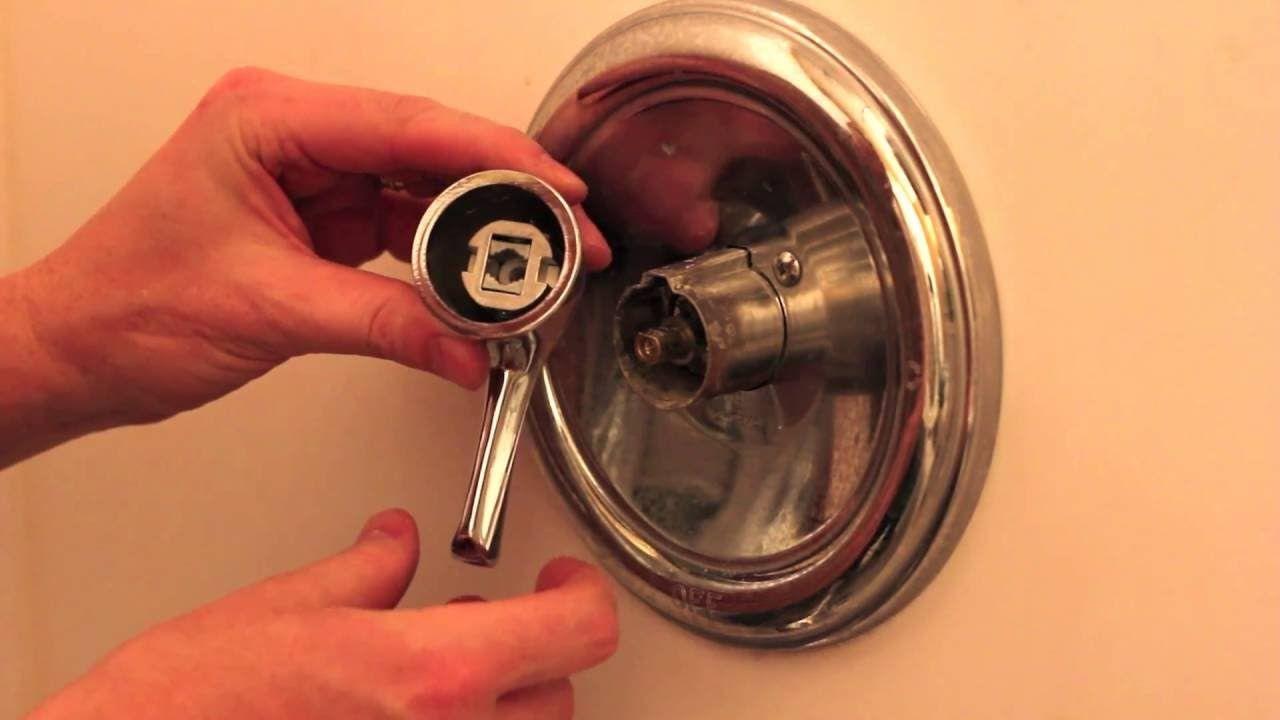
Photo from Pinterest
4. Pull the chrome sleeve straight out with your hand to remove it. If it does not come out, gently twist it back and forth while pulling. If it still does not come out, wrap a towel around it and extract it with the pliers. Place the chrome sleeve on the rag and set it aside.
5. Using a pair of channel lock pliers, remove the packing nut in the centre of the faucet assembly. Place the nut on top of the rag.
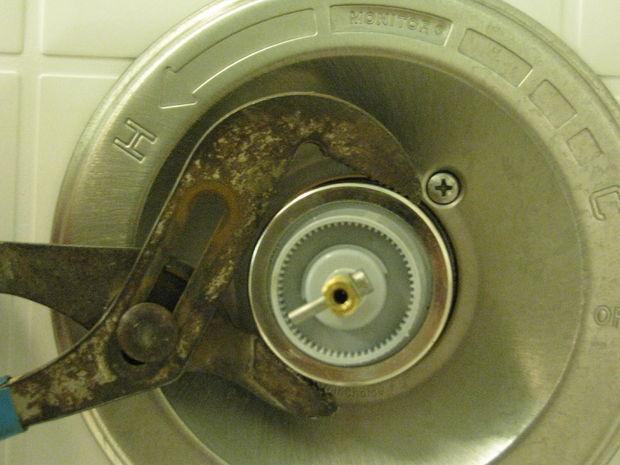
Photo from Terrylove
6. By gently twisting and drawing the stem cartridge toward you, you can remove the complete cartridge.
Examine the stem cartridge for any signs of wear and tear. You should see multiple O-rings in the 1500 series, which are common sources of leaks when damaged. Examine the O-rings for tears and abrasions.
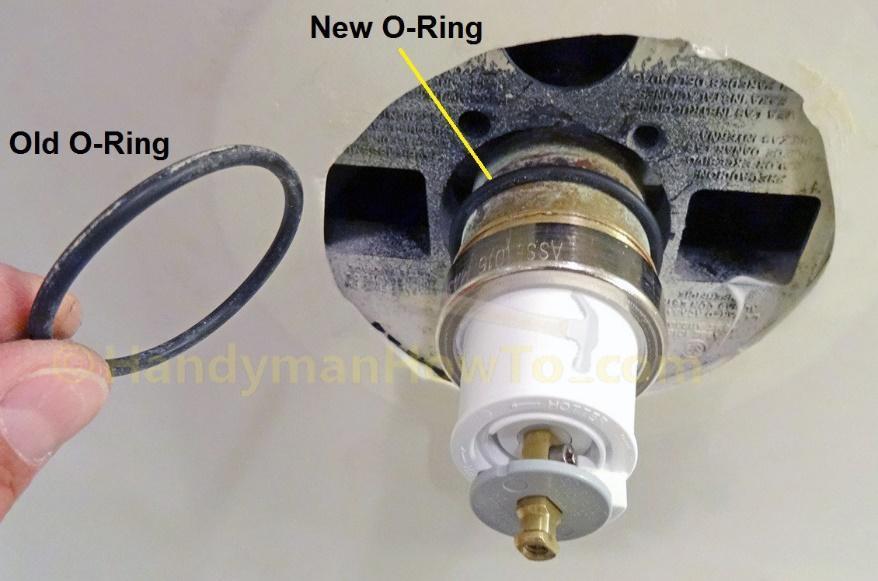
Photo by DIY.StackExchange
Any worn O-rings should be replaced with new ones from the Delta Monitor faucet repair kit You may need to purchase a replacement stem cartridge if the entire stem cartridge appears to be damaged.
7. Put the faucet back together. Refer to the order of the parts on the cloth and reverse the processes. Restart the water supply at the main water supply.
Final Thoughts
- Take note of the position of the stop on the cap before removing the valve cartridge assembly. Make that the valve cartridge assembly is in the exact place it was taken out of. In most cases, the stop is on the left.
- Never use a screwdriver to remove the valve cartridge out of the faucet head. Make use of the proper tool. With the channel-lock pliers, grasp the cartridge's apex and turn it a quarter counterclockwise before lifting it out.
- When your water supply contains high amounts of lime, rust, minerals, and other impurities, test your Delta Monitor shower faucet on a regular basis.
Our Delta products are one of the most popular products we carry. Find more Delta faucet products here!
Explore More: faucets