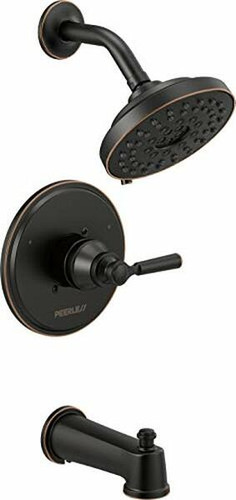
The Delta single-handle shower faucets are made with durable material, have high-performance rates, are well-designed, and are covered by a lifetime warranty.
Furthermore, the spare parts for Delta single-handle shower faucets are quite affordable and fairly easy to install.
Before purchasing the Delta single-handle shower faucet parts, you will need to identify the kind of faucet that you have.
Some of the Delta shower faucet parts include the Delta single handle kit, handle button, rectangular cam, cap assembly, packing, triangular cam, steel ball with a round pin, seats and springs, steel ball with diamond-shaped pin, seats and springs, push-button diverter, balancing spool, screws and Delta escutcheon assembly.
How to Repair a Delta Single Handle Shower Faucet
It is recommended to purchase a brand new Delta shower faucet kit if the old one has numerous problems. The following are the repair instructions:
- Shut off the main water supply. You can achieve this by simply locating the valve to your shower faucet to turn it off.
- Turn on any of the wall hydrants that are outside your home. Let it run for a couple of minutes. Letting the water run is meant to drain the supply line of water to your home. Turn on the Delta shower faucet inside the house. This should help drain all the water from your faucet as well. Use an Allen wrench to remove the faucet’s handle. The owner’s manual should help you in doing this.
- Remove the screw that has been used to secure the faucet, followed by the bonnet nut. You will require a strap wrench. The bonnet nuts may be stuck in place if your Delta shower faucet has been used for a long time. You can use the plumber’s grease to remove the nuts. Remove the bonnet nut. Remove the cam and ball assembly that is now exposed underneath the bonnet nut.
- Use a pair of fine tweezers to remove the springs, together with the rubber seats. A sharp pick would work just as well. Both the springs and the rubber seats are usually located inside the housing of the Delta single-handle shower faucet.
- Once the seats and springs are out of the way, inspect the inside of the faucet housing for any signs of cracks or calcium build-ups. The build-up can easily be removed with the use of the picks. Lubricate the new seats from the kit. Do not use petroleum jelly. We recommend vegetable oil and silicone grease.
- Install the new seats inside the springs and let the small side in first. Insert the seat and springs assembly inside the faucet’s housing using a pick or screwdriver.
- Lubricate the ball assembly and then insert it into the faucet’s housing ensuring that it is aligned correctly. Place the cam on the ball assembly and ensure that the little tab that is located at the side of the Delta cam assembly is inserted inside the faucet’s housing slot.
- Thread the bonnet nut back on while holding the cam in place using your finger. Use a strap wrench to tighten the bonnet nut and then reconnect the handle. Then turn the faucet off.
- Turn the water supply to your house back on about 1/3 of the way. This will make it possible to fill up your pipes. Do turn the water back on yet, since that may cause a build-up of calcium inside the pipes and further cause them to be clogged. After the inside of the pipe has been released, turn the water supply on. Inspect your Delta single-handle shower faucet for any leaks or other issues.
How to Replace an Old Delta Shower Valve Cartridge
A faulty Delta shower valve cartridge is usually the main cause of several issues. These are such as a sudden switch from hot to cold water, leaking as well as changes in the water pressure. In such cases, it will be easier for you to change the Delta shower valve cartridge than to have to replace the entire unit.
The following are the steps on how to replace the Delta shower valve cartridge:
- Remove the trim sleeve and the spacer, right after you removed the faucet handle. This is one of the easiest steps to carry out.
- Use a strap wrench to loosen and remove the bonnet nut.
- Grab and wiggle the valve cartridge back and forth, then pull it out.
- Insert the new Delta shower valve cartridge. While doing this, ensure that the side that is labeled “hot” is on the side of the valve where hot water usually comes off in your faucet.
- Using the slots that are found in the faucet valve, line up the keys with those same slots.
- Hand-screw the bonnet nut onto the faucet and tighten until it is snug.
- Place the Delta shower faucet handle back on.
- The Delta shower valve cartridge is now successfully replaced. Turn the water to your shower back on slowly at first to get rid of the air that is inside the pipes. Check for any leaks.

