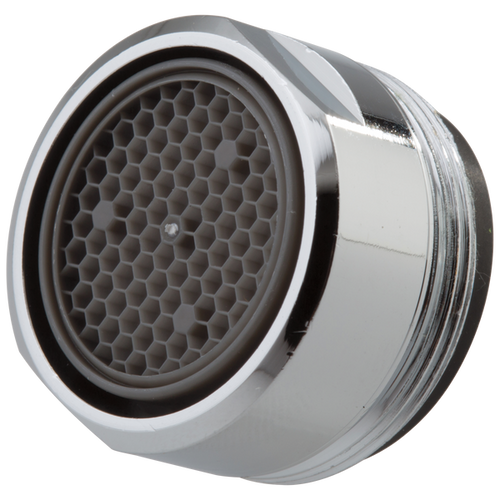
With time, a lot of dirt can build up in the spray head, especially the aerator of your faucet. This will decrease the water pressure in your kitchen faucet, and the debris will prevent water flow. In such a situation, even before you worry about the defective parts, try cleaning the aerator and check the warranty.
Surprisingly, cleaning the faucet aerator is not a daunting task and will only take a few minutes of your schedule. Follow the guide below:
What causes buildup in faucet aerators?
Almost every kitchen faucet will accumulate mineral deposits and dirt that hinder water flow. Although the source of dirt can be traced, calcium is different.
Since tap water is treated using calcium, it can build up over time and start causing problems. Such accumulation can affect both the outer and internal parts of the faucet, mainly the valves and aerator. Once the build-up reaches a certain point, it blocks water flow, leading to poor flow rates and leaks.
The build-up can also form in water supply lines, but before you think of disassembling your Delta faucet, try to clean the aerator to check if that solves the low water pressure problem.
How to disconnect the pull-down kitchen faucet spray head
You can see the hard water deposits in the outer holes of the aerator or spray head. In most faucets, the aerator can be in the junction point of the hose and spray head, or the front part of the spray head. Once you see that clog in the aerator or spray head, disconnect them from the faucet hose.
Step 1: Hold the spray head and the hose.
Step 2: Rotate it clockwise from the connector.
Step 3: Once you disconnect the connector, you will see a rubber ring. Don't interfere with it. Secure and fix the hose outside the faucet pipe, as the hose can slip inside the pipe. It will be difficult to remove it without a spray head.
Step 5: Take a tool pick and remove the plastic screen from the spray head.
Step 6: Clean your spray head.
Caution: Although you can remove the aerator from some spray heads, check all removable parts for deep cleaning.
Cleaning a kitchen faucet head
Cleaning a kitchen faucet head can be a bit tricky. Nevertheless, you can still clean your faucet spray head without being too technical. Follow this guide below:
Materials:
- Toothbrush
- Cloth
- Bowl
- Rubber band
- Sandwich bag
- Distilled white vinegar
- Fill the bowl with vinegar to have the faucet head submerged in, then place it in the sink or on the countertop. To clean the entire faucet head, dip everything in the vinegar. Allow it to soak for a few hours. This can work best if left overnight. After it has completely set, rinse the parts with clean water. Assemble it to the faucet and check the water flow.
- The aerator in the faucets oxygenates water through. It reduces the flow using a straightforward mechanism, hence saving water. At the back of the aerator are several tiny holes to increase water pressure as the water passes through.
- When dirt or mineral deposits build up on the aerator, the holes get blocked, reducing water flow. Remove the aerator from the spout, run it underwater, and then clean the build-up sediment using a sponge or cloth. If there are sticky deposits, you can soak the aerator in vinegar for a few minutes to loosen the gunk.
How to remove the aerator from a Delta pull-down kitchen faucet
Many Delta pull-down kitchen faucets have the aerator cached and cannot be assessed easily as in some models. Removing the aerator is just a walk in the park if you have the key.
Check beneath the faucet spout, and you will see several notches surrounding the insert aerator. If this is not possible, you can as well use a small mirror to see the notches or check from the Delta faucet aerator assembly diagram. The Delta faucet is packed with a special cylindrical tool that fits well inside the designated notches. Using the tool, you can remove the aerator.
If you don't have the tool, you can get it from several third-party manufacturers that sell similar keys.
How to remove a Delta faucet aerator without a tool
There are other available options if you don't have the plastic removal tool. Try to twist the aerator with your fingers. It was probably hand-tightened during installation. Therefore, you can be able to turn it with your hand. If it slips, you can use a rubber glove to get a good grip on it.
However, if it is not possible to turn the aerator, try using a flathead screwdriver or butter knife. Wedge the tip of the screwdriver or blade into one of the notches and push. If the mineral build-up makes the aerator stick to the faucet body, use a hammer to tap the screwdriver lightly.
A pair of needle-nose pliers can also do the task. Hook the jaw tips into the aerator notches and rotate it counterclockwise.
Our Delta products are one of the most popular products we carry. Find more Delta faucet products here!
Robert Syengo is an experienced web writer with a home improvement history that includes toilet remodeling and appliance installation. He enjoys writing and learning about electronics, gardens, design, remodeling and repair.

