

The American Standard Champion Toilets were created to meet the current industry’s highest standards of flushing performance. These toilets eliminate clogs and provide an efficient clean at all times.
American Standard Champion 4-Right Height Toilets: Pros
- Low water consumption - The toilets use only 1.6 gallons per flush!
- Cleanliness - The ever-clean surface feature keeps the toilet clean for longer periods.
- Powerful action - These toilets have an elongated siphon action jetted bowl.
- Easy installation - The American standard champion toilets are easy to install.
- High quality, amazing value - These toilets are made with high-quality material, and they do not slam as they close.
- High performance - The toilets always produce a powerful yet quiet flush.
Adjustment for the Single Flush American Standard Toilet
Turn the water level adjustment knob to move the float cup up or down. This should adjust the water level to the level indicated on the tank.
Adjustments for the Dual Flush American Standard Toilet
Adjust the water level - Adjust the float cup using the water level adjustment knob and adjust the water level to the level that is indicated on the tank.
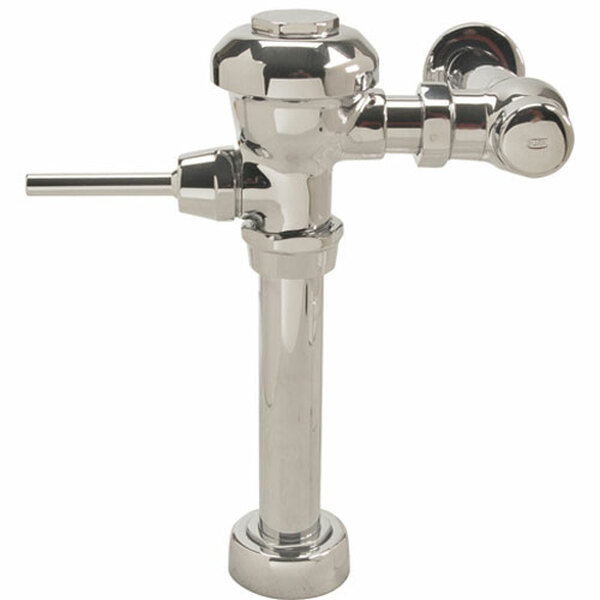
Adjustments for the American Standard Flush Valve
1. Turn the water supply on.
Adjust the float cup so the water reaches the levels indicated in the tank. This can be done by submerging the float cup completely into the water for roughly 30 seconds right after turning on the water supply. By turning the water level adjustment rod and moving the float cup up or down, you can adjust the level of water in the tank.
2. Adjust the lift chain.
Adjust the lift chain if the bowl fails to siphon. You can remove the bead chain from the clip and reinsert the slack on the chain onto the lift rod.
Flush Valve Setting Adjustments
Without Liner Tank Full Flush Adjustment Lite Flush Adjustment 2 2.5 Flush Valve. Every other setting will result in either more or less water and that is not recommended.
To remove the flush valve, apply slight downward pressure on the flush valve and twist it until it gets disengaged from the bayonet.
If you want to reinstall the flush valve, simply reverse the steps. Here is our American Standard Champion 4-Right Height Flush Valve.
Indicators of toilet running problems:
- The water supply valve is closed.
- The supply line is blocked.
- The flush valve chain is too loose or disconnected.
- Sand or debris is lodged inside the water control.
- Water in the bowl may be too low.
- The supply valve may be partly closed.
- The trapway, the drain or the vent could be clogged by debris.
- The supply pressure may be too low.
- The flush valve may be open due to the valve chain being too tight.
Troubleshooting an American Standard Toilet
- Open the valve to let in water so that it can fill the tank.
- Shut off the water supply so that you can inspect all the gaskets and the washers. After the inspection, you can reassemble all the parts.
- Readjust the chain’s length, making sure it is not tight.
- Shut off the main water supply and remove the cap so that you can clean it.
Indicators of a toilet that does not shut off:
- The flush valve seal may be deformed.
- There may be debris lodged inside the water control.
Troubleshooting a toilet that does not shut off:
Clean the seal surface to get rid of any debris and replace the valve seal. Remove the cap to clean it after you have shut off the water supply.
Indicators of a leaking toilet:
A poor supply line connection or poor bowl to tank/floor connection.
Troubleshooting a Leaking Toilet

1. Test the flapper.
Push the flapper down using a stick immediately when you hear the water running. If the water stops running, this is an indicator that the flapper is not sealed properly. It may be time for a replacement.
Check the fill tube length and cut about ½ an inch above the water line.
Shut off the water supply valve under the toilet or the main water supply. Unhook the old flapper after you have drained most of the water from the toilet by flushing it. Use a new flapper and hook the flapper chain onto the flush lever arm, making sure there is a little slack when the flapper is closed.

2. Check the fill valve for a leak.
Flush the toilet and check if the fill valve is leaking. Lift the toilet float arm to check if the tank is filling, or if the water has stopped flowing. Adjust the toilet float arm to stop the tank from filling. Do this when the water level is at ½ to 1-inch below the top of the overflow pipe. If the fill valve still leaks, you will have to replace it with a new one.
3. Remove and replace the old toilet fill valve.
Turn off the main water supply and then flush the toilet. Sponge the remaining water from the tank and disconnect the water supply line. Proceed to unscrew the fill valve lock nut and lift out the old fill valve to remove it completely.
4. Install the new fill valve.
Insert the new fill valve in to the tank and tighten the locknut. Make sure that the overflow pipe is not higher than the critical level mark.
5. Connect the fill tube.
On one end of the new fill tube, attach the fill valve nipple and to the other end, attach the enclosed angle adapter. Clip the angle adapter onto the overflow pipe. Finish the installation process by attaching the flapper chain to the flush lever. Be sure to turn on the water and test how the flush is.